Recent Posts

Pumpkin, Carrot and Red Lentil Soup

Pumpkin, Carrot and Red Lentil Soup

Percy the Pumpkin is the gift that just keeps on giving. So far he has been resurrected as delicious dog treats approved by both large and small breed representatives, melt in your mouth pumpkin mini scones, and now he’s about to make his debut on 

Gravlax Cream Cheese Slather

Gravlax Cream Cheese Slather

So, I thought I had an expensive, epic fail on my hands with the Gravlax I made BUT I soaked it in cold water, dried if off, sliced it up and it was actually pretty good. However, I was still worried about the salt and 

Lemon Curd in the Microwave – Yes, it’s a (really good) thing

Lemon Curd in the Microwave – Yes, it’s a (really good) thing

So, I’ve been using a lot of lemon zest for this and that lately and had a total of 3 lemons sans zest. It was time to use some lemon juice. Thank you to Ioanna Limberopoulou of Ioanna’s Notebook for this super easy, super fast, super delicious lemon curd recipe. I live in fear of links breaking so I’ve put the English translation below and I did leave out a few of Ioanna’s steps (they were not necessary to acheive a great finished produce IMHO).

Ingredients

  • 1 C white sugar
  • 3 eggs
  • 1 C fresh lemon juice
  • zest of 3 lemons
  • 1/2 cup unsalted butter, melted

Method

  1. In a large microwave-safe bowl, whisk together the sugar and eggs until smooth.
  2. Whisk in lemon juice, lemon zest and melted butter.
  3. Cook in the microwave on full power for 1-minute intervals, stirring after each minute. This process will take about three to five minutes depending on the strength of your microwave. You will know the lemon curd is done cooking when it coats the back of a metal spoon.
  4. Remove from the microwave. Once the curd has cooled to room temperature, cover it with a lid and store it in the refrigerator for about 2 weeks. The curd will thicken as it cools.

I ended up using the juice of one Cara Cara orange to make up the 1 C of lemon juice and I only had one lemon with the zest still on so I didn’t quite follow the recipe but it still turned out well.

I’ve got a bunch of limes in the fridge as well and I think I might just give this a go with lime juice to see what happens. I can see folding the curd into a light ricotta cream or good ol’ whipped cream for a light dessert or using it as the base for a fruit flan. Speaking of flan…hmmm that’s next.

Pumpkin Peanut Butter Dog Treats or The Reincarnation of Percy the Pumpkin

Pumpkin Peanut Butter Dog Treats or The Reincarnation of Percy the Pumpkin

Percy the Pumpkin did double duty this year. He guarded the balcony and when he was done, I roasted him up to make pumpkin puree for dog treats. Most people know that carving pumpkins aren’t what you want for baking (too stringy) but they are 

Fire Alarm Balsamic Roast Pork Tenderloin

Fire Alarm Balsamic Roast Pork Tenderloin

Disclaimer: None of what happened is Kevin’s fault in any way. Here’s what happened. I had a pork tenderloin that needed using, and I saw this recipe for Balsamic Roast Pork Tenderloin from Keviniscooking.com. First, let me say the tenderloin and the sauce were indeed, 

Adventures with Graavilohi aka Gravlax aka cured salmon

Adventures with Graavilohi aka Gravlax aka cured salmon

As part of a project on international holiday traditions, being orchestrated by Jeanette Kathryn Schramm of Apartmenteats.com (coming soon), I agreed to contribute some Scandinavian recipes. My Mom is Finnish and my Dad is Scottish, so they both like salmon. Together they have made a mean gravlax (not me).

My Mom (bless her Pagan heart) can’t follow a recipe to save her life. She just can’t help herself. It has got to the point where the kids hide the ginger root and I hide the garam masala whenever she comes to visit. Apparently, I am my mother’s daughter. This recipe is a combination of the gravlax recipe from Sheila Lukins’ All Around the World Cookbook and Jamie Oliver’s Easy Salmon Gravlax. I had fully intended to follow Sheila Lukins’ recipe, but I would have had to buy a $33 bottle of Pernod for one Tbsp and I am also my Father’s daughter apparently, so I opted for Vodka instead.

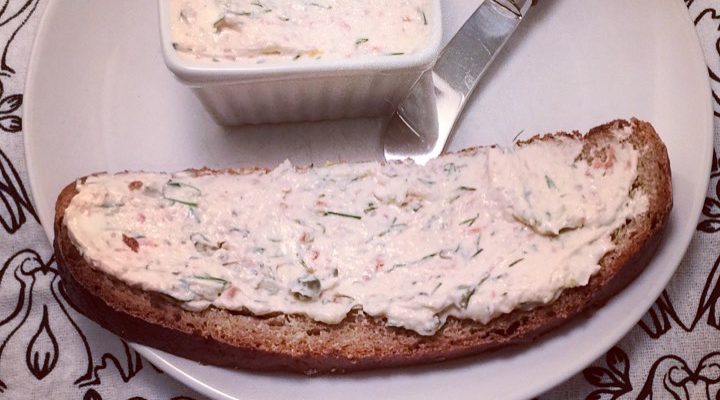
If you end up with leftover gravlax use it to make a delicious Gravlax Cream Cheese Slather with lemon and dill.

Ingredients

2 fresh salmon fillets, pin boned (I used wild sockeye) – 1lb each and the same size, skin should be left on. Don’t cheap out, get the good stuff.
50 mL Vodka* (one of those little bitty bottles)
¾ C brown sugar
8 Tbsp coarse salt
1 Tbsp white peppercorns, coarsely crushed
Zest of 1 lemon
1 large bunch of fresh dill (about 2 ounces), coarsely chopped (reserve a couple sprigs for garnish)

Equipment

  • 8x13x2 Pyrex baking dish to keep the salmon in while it’s curing. Whatever you use needs to be non-reactive and deep enough to catch the water that will be released from the fish as part of the curing process.
  • Plastic wrap
  • Tin foil aka aluminum foil
  • A platter or cutting board and some cans (or a brick!) to weight down the salmon while it’s curing. The salt draws out the liquid from the fish and the weight helps this process.

Method

  1. Wipe the fillets with a damp paper towel and remove any remaining small bones (pin bones) with tweezers. You find them by running your hand up the salmon fillet.
  2. Sprinkle the flesh side of the fillets with the Pernod and rub it in well.
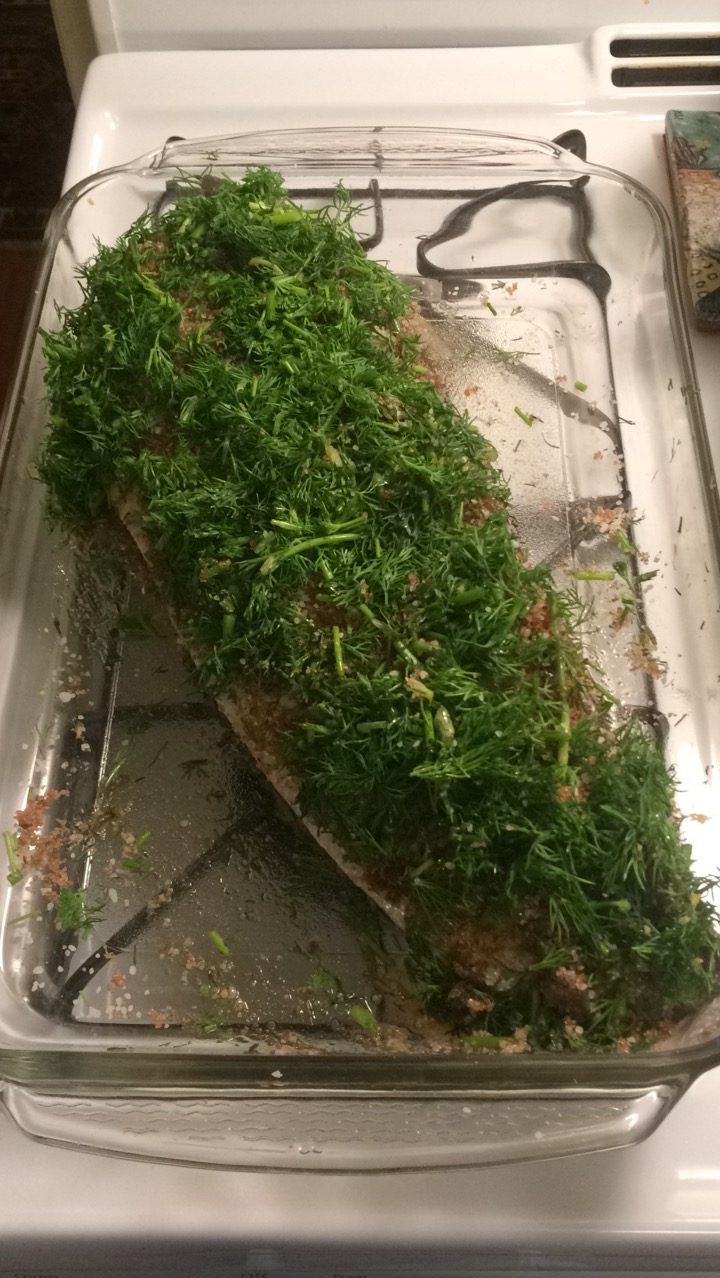
  3. Combine the sugar, salt, and pepper in a small bowl. Sprinkle one-third of the sugar mixture on the bottom of a non-reactive (e.g., glass) baking dish just large enough to hold the salmon in two layers. Cover with one-third of the chopped dill.
  4. Lay one of the fillets, skin side down, on top of the dill.
  5. Sprinkle half the remaining sugar mixture on the flesh side of the fillet and pat firmly.
  6. Sprinkle with half the remaining dill and cover with the remaining fillet (flesh side to flesh side).
  7. Sprinkle with the remaining sugar and dill.
  8. Cover tightly with plastic wrap and then a sheet of tin foil.
  9. Weight the salmon down by placing a cutting board (or platter) with several heavy cans or a brick on top. Marinate in the fridge for 36-48 hours, turning the salmon every 12 hours.
  10. To serve, scrape the marinade off the fillets. With the skin side down, slice the fillets on the diagonal and with the grain using a long, thin, super sharp knife. If you want to see how to slice gravlax check out Slicing Smoked Salmon with Gordon Ramsay. Don’t slice your fingers off…that’ll wreck the gravlax for sure ;).

Serves 10-12 (about 4 slices per serving)

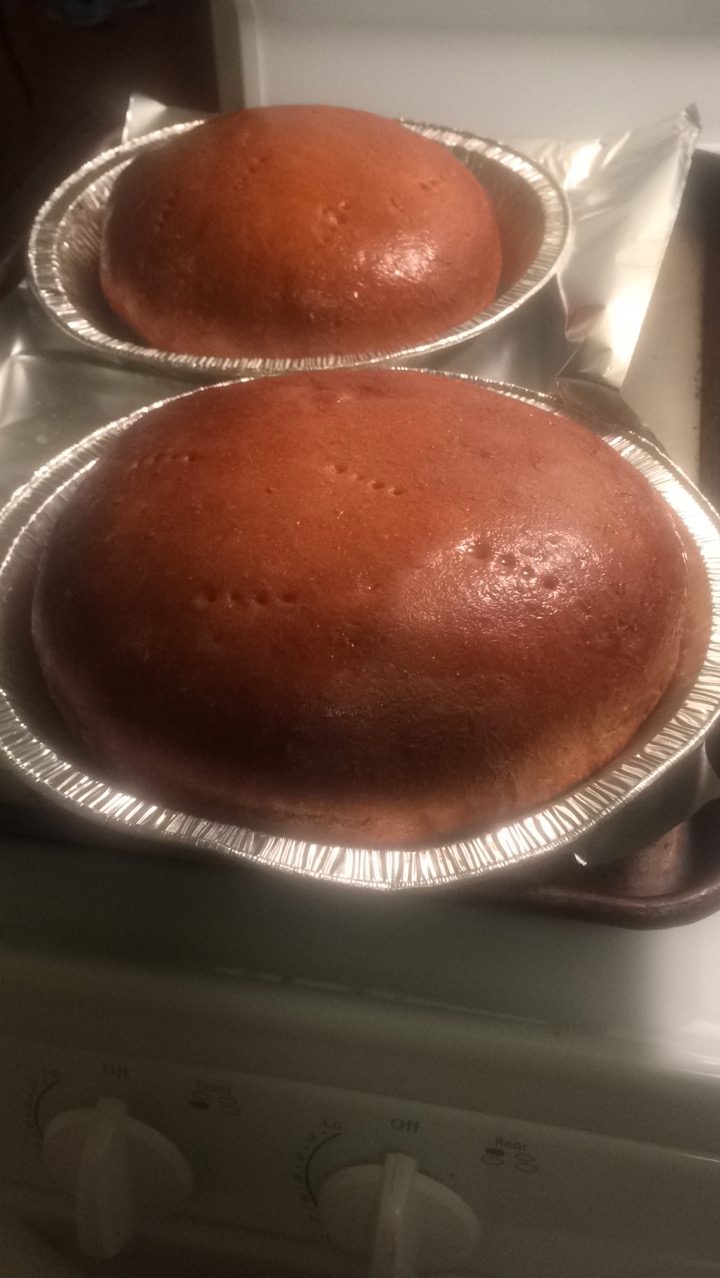
Serve on Finnish sweet bread (Limppuleipa) and Sweet Dilled Mustard Sauce (recipes follow).

Notes: Gravlax freezes really well. Wrap leftover pieces individually and tightly in Clingfilm, seal, label, and freeze for up to 2 months.  To serve, partially thaw the frozen salmon for about an hour before slicing. Don’t freeze the mustard sauce…make that fresh.

Sweet Dilled Mustard Sauce

This is the classic accompaniment to gravlax.

Ingredients

2 Tbsp Dijon mustard (use the smooth kind)
2 Tbsp cider vinegar
2 Tbsp white sugar
Salt and coarsely ground white pepper to your taste
½ C vegetable oil (or light tasting oil – not olive oil)
2 Tbsp chopped fresh dill

Method

In a small bowl, combine vinegar and sugar and stir to dissolve. Whisk in the mustard, salt, and pepper. While whisking constantly, slowly drizzle in the oil until the mixture emulsifies (it will get thick and creamy). Stir in the chopped dill. You can store this in an airtight container until you are ready to use it. Bring it to room temp and whisk again before serving.


Auntie Leila’s Ceasar Salad Dressing…All Hail the Queen of Finland

Auntie Leila’s Ceasar Salad Dressing…All Hail the Queen of Finland

My Auntie Leila’s nickname is the Queen of Finland. She always looks amazing, her home is spotless (it’s either Finnish elves or she’s got servants she’s not telling us about) and she can cook like nobody’s business. This salad dressing is fit for a Queen 

Rye Crackers – Tweaked Version of Bob’s Red Mill Rye Crackers

Rye Crackers – Tweaked Version of Bob’s Red Mill Rye Crackers

Rye crackers are a great addition to any cheese board and this recipe, a tweaked version of the recipe on the back of the Bob’s Red Mill organic rye flour bag, is both easy and seriously good. The original recipe doesn’t seem to be on 

Limppuleipä – My Mummu Raihala’s Recipe

Limppuleipä – My Mummu Raihala’s Recipe

Limppuleipä is a sweet rye bread that is flavoured with orange zest, anise, fennel and caraway seeds. It is the perfect base for Finnish gravlax (or any other cured or smoked fish come to think of it).

This was the other bread I learned to make when I went to visit my Mummu. I have made the Oatmeal Bread a number of times now (I’m still working at getting it right but the “failures” are still pretty good so I’m ok with that).

Ingredients

1 C corn syrup
2 Tbsp orange zest
1 Tbsp fennel seeds
1 Tbsp anise seeds
1 Tbsp caraway seeds
1 L buttermilk (about 4.2 C)
1 Tbsp salt
½ C brown sugar
Yeast mixture (4 tsp yeast, ½ C warm water, 4 tsp sugar)
4 C dark rye flour, plus 1 C for kneading in
4 C white flour, plus 1 C for kneading in

Basting

1 Tbsp corn syrup dissolved in ½ C warm water

Method:

  1. Boil corn syrup, fennel, anise, caraway seeds, and orange rind for about a minute (you don’t want to make candy! Or, maybe you do, I don’t know.
  2. Warm the buttermilk to luke warm and mix with syrup, salt and ½ C brown sugar
  3. Proof the yeast mixture – stir the yeast, water and sugar together and let stand for about 10 minutes. It should bubble up which shows the yeast is still active and ready to use.
  4. Mix yeast mixture and the buttermilk mixture together in a large bowl and start adding flour alternating between rye and white flours until a soft dough forms. It will be pretty wet and sticky. Don’t worry about that, you’ll be kneading flour into it after the first rise.
  5. Sprinkle a bit of flour on top of the dough, cover with a sheet of parchment paper and then a clean tea towel (or “tee towvel” as my Mummu would say) and let rise until doubled (takes about an hour).
  6. Turn the dough out onto a floured surface and knead in extra flour until you get a nice smooth elasticy dough. I started by kneading in about 1 C of rye flour and then 1 C of white flour before I got the dough to the point where it was not sticky.
  7. Shape into 4 round loaves.
  8. Place them in greased pie tins (I just use the tinfoil kind), cover with your clean tee towvel and let them rise until doubled (took about 45 minutes, I could probably have let them go a bit longer but I got impatient).
  9. Bake in an oven preheated to 325 F for 1 hour.
  10. After 30 minutes baste with syrup and water mixture. DO NOT OPEN THE OVEN until at least 20 minutes has gone by.
  11. Continue baking for another 30 minutes.
  12. Baste a second time when you remove the bread from the oven.
  13. Let them cool about 10 minutes, cover with waxed paper and your towels and let the bread cool completely.


This bread tastes better and better after a couple of days (it cures). It also freezes well.


Rosemary Pecan Raisin Crackers

Rosemary Pecan Raisin Crackers

Rosemary, pecans, raisins balanced with a hearty brown bread base, double baked into a light crispy cracker. You can’t go wrong. These are truly delicious. Culinary pioneer Lesley Stowe created a hit with her Raincoast Crackers, but they are expensive. The first copycat recipe I